Showing posts with label butter. Show all posts

Sunday, August 22, 2010

Brown Eyed Susans


When I put together my cookbook a year or so ago, I knew this recipe would have to be part of it. So old is this recipe, I can remember coming home from school and seeing a batch of these on the countertop. As busy as my mother was with four children, she somehow found the time.  If you own the book, you know that I featured this recipe in the dessert section by putting a picture of the original recipe from the back of a Parkay Margarine box. It was so stained and tattered, it tells a big tale, and a happy one too, of those little things that my mother did for us.  Today I went to visit her at her new "home" and brought her some of these cookies so she could decide which lucky resident would get one of them. I wonder if my mother realizes how this silly little recipe that has stuck with me for many years longer than I care to mention has had such an impact on me.  Try the recipe and see for yourself if you think this isn't one of the best shortbread cookies you've ever eaten.  Of course, Parkay Margarine is a thing of the past, so I've used butter here instead, and what's not to like about that?

BROWN EYED SUSANS
1 cup softened butter
3 Tbs. sugar
1 tsp. pure almond extract
2 cups flour
1/4 tsp salt

Cream the butter. Add the sugar, almond extract, flour and salt.  Roll this mixture into small balls the size of a walnut. Place on an ungreased cookie sheet. With your thumb or finger, make a deep indentation in the center of the dough. Bake in a preheated 400 degree oven on the middle rack for about ten minutes until lightly browned on the bottoms. When cool, frost with:

1 cup of confectioners sugar
2 Tbs. cocoa
2 Tbs. hot water
1/2 tsp. vanilla

Sift together the sugar and the cocoa. Add the hot water and vanilla and beat well. Make sure the cookies are completely cooled, then top each cookie with a small amount of frosting. If the frosting becomes thick or hardened while waiting for the batches to cool, add a drop of water and mix it up again. Don't overdo it with the frosting, as you want to end up with a nice little round blob of frosting atop each cookie!

The original recipe called for a blanched almond half to be placed in the center of the frosting, but Mom never did it this way, and we thought they were awesome. I did, however, have sliced almonds on hand and thought the addition of a small thin slice of almond on top would make the perfect decoration for these delicious shortbread cookies.

Makes about 2 1/2 dozen.

Buttery, melt-in-your-mouth Brown Eyed Susans

Monday, August 9, 2010

Chili Cheese Mini-Bites

I've been making a lot of muffin/cupcake shaped things recently, Banana Ginger Snap Cupcakes and Carrot Coconut Cupcakes with Marmalade Buttercream Icing and today isn't any different. The major difference is that this recipe is a tasty little appetizer and not a full-blown, bag-your-diet sweet treat. I was thinking about that line from Julia Roberts' upcoming movie, "Eat, Pray, Love" where she says "leave no carb behind."  Very funny.  So in this recipe, I have left all carbs behind, and you and anyone else eating one can feel comfortable knowing you're eating a cheesy, spicy, veggie-filled little tidbit.  I'm mildly hooked on Cabot Hot Habanero Cheese these days, and I thought a combination of that plus the Seriously Sharp Cheddar would be a good combo.  They're great. Try them next time you're making appetizers.


CHILI CHEESE MINI-BITES 
1 Tbs. butter
3 green onions, thinly sliced
1 clove of garlic, minced
1 tomato, chopped (I used a Roma)
4 eggs, beaten
1/4 cup black olives, sliced (I used half a dozen)
2 oz. Cabot Hot Habanero Cheese
2 oz. Cabot Seriously Sharp Vermont Cheddar
1 tsp. chili powder
1/2 tsp. cumin
1/8 tsp. cayenne pepper
S&P to taste


  • Preheat the oven to 425 degrees and coat a mini muffin tin with cooking spray.
  • Melt the butter in a small pan and saute the onions, garlic and tomato until the onion is soft. Remove from heat and transfer this mixture to a medium sized mixing bowl. Allow to cool for a few minutes.
  • Shred both cheeses.
  • Beat the eggs and add them to the vegetable mixture along with the remaining ingredients.
  • Fill each mini muffin tin with a heaping Tablespoon of the mixture.
  • Bake for ten minutes.
  • Remove from oven, allow to sit for a minute, then run a knife around the edge of the cups and place on a serving dish.
  • Serve warm. These can be reheated easily. Or, serve cold like a quiche.
  • Makes a few less than two dozen, and only about 30 calories each, and a trace of carbs.

Peggy is always where the food is!

Saturday, August 7, 2010

Banana and Ginger Snap Cupcakes

You know what they say about bananas, don't you? Umm, I don't either. I do know that if you're patient but a few days after purchasing them practically green you will have beautifully overripe fruit just perfect for baking.  Plus I really wanted to try out my new decorating tool, and as you can see by the pictures I could use a little more practice. Though they weren't all perfect looking (but they weren't too shabby either for my first time), I promise you they taste awesome. I took almost, that's right, almost all of them to my mother's place today and gave them to the gals working there. They loved them! Using a tried and true banana cupcake recipe from Martha Stewart, I kicked it up a notch with the addition of ground ginger. Here's the simple recipe for these light, moist and delicious treats.


BANANA AND GINGER SNAP CUPCAKES
1 1/2 cups flour
3/4 cup sugar
1 tsp. baking powder
1/2 tsp. baking soda
1/4 tsp. salt
1/2 tsp. ground ginger
1/2 cup unsalted butter, melted and cooled
2 to 3 large ripe, thoroughly mashed bananas
2 eggs
1/2 tsp. vanilla

GINGER BUTTERCREAM FROSTING
1 1/2 cups powdered sugar
1/2 cup butter, very soft
1 1/2 tsp. milk
1/4 tsp. vanilla
1/2 tsp. ground ginger
1/4 cup crushed ginger snap cookies for the tops

Preheat the oven to 350 degrees and line a 12-cup muffin pan with regular sized paper or foil liners. In a mixing bowl, stir together the first six ingredients, the flour through the ginger. In another bowl, stir together well the butter, bananas, eggs and vanilla. Add all at once to the flour mixture and stir well. Divide the batter evenly between the 12 cupcake liners, approximately one-quarter cup of batter per cupcake. Bake for approximately 20 minutes, maybe a minute or two longer, until a toothpick comes out clean and dry. Remove immediately from pans to a wire rack and cool completely before frosting.

For the frosting, mix the sugar and butter together and add the milk, vanilla and ground ginger. You can always add more milk, so always start with less. Frost the cooled cupcakes simply or try your hand at decorating. Sprinkle the tops with the crushed ginger snap cookies. Enjoy!!!

I love comments. It makes me feel like I'm doing this for someone other than myself. If you stop by, and you have an extra second, say hi. Thanks!!!

Not too much, not too little....just perfect!

Friday, July 23, 2010

Carrot and Coconut Cupcakes with Marmalade Buttercream Icing


Why, you must think I've gone nuts making batches of mac and cheese and the like, for who? Just me? Seriously, I am NOT eating all of this stuff.  Like today, for instance, I wanted to bring something to my therapist who is helping me with my..... oh, you thought I was going to say my head, didn't you? She's an occupational therapist, a hand specialist, and she's helping me get the use back in my hand that had surgery in three different places.  I like to bring her things that show my appreciation. I'm bringing her cupcakes today!  Using ingredients I have on hand, I put together a basic cupcake recipe and added some of my favorite things to it, especially in the icing, orange marmalade....  Now, I got a little overly zealous dividing the mixture.  This recipe should really make a dozen cupcakes. But I had two things going against me.  Firstly, I had jumbo cupcake liners and secondly, I didn't want them to look skimpy so I added a little too much batter to each one.  I have more like 8 jumbo cupcakes instead of 10 to 12 regular cupcakes.  When you make them, buy regular sized cupcake liners and divide the batter accordingly.  Enjoy! And let me know if you try them, or if you'd like me to make them for you..... Ask me, I might!


CARROT AND COCONUT CUPCAKES 
WITH MARMALADE BUTTERCREAM ICING
1/2 cup dark brown sugar
3/4 tsp. baking soda
1 tsp. baking powder
1/2 tsp salt
1/2 tsp. cinnamon
1 cup finely chopped carrot
1 cup coconut
1/3 cup raisins
1/4 cup oil (not olive oil)
1/4 cup butter, melted
2 eggs
1 cup flour


  • Preheat the oven to 350 degrees.
  • I chop the carrots first in my food processor. If you have one, do the chopping in it. It produces a very small chop, perfect for the cupcake. If you don't own a processor, then chop away. Set aside.
  • In a large mixing bowl, stir together the first seven ingredients, the sugar through the raisins.
  • Using a hand mixer, beat in the oil and butter.
  • Continuing to use the mixer, add the eggs one at a time, beating well after each addition.
  • Lastly, add the flour and beat with the mixer for another minute or two. (like you would a cake mix).
  • Divide the mixture among at least 10 to twelve regular cupcake liners set in a muffin tin. Bake for approximately 20 minutes or until a toothpick comes out clean and dry. Remove from the muffin tin and cool on a rack completely before frosting.


MARMALADE BUTTERCREAM ICING
1/2 cup butter, softened
1/3 cup orange marmalade
1/2 tsp. vanilla
1 1/2 cups powdered sugar
1 to 2 tsp. milk
1/4 cup finely chopped pistachio nuts, optional

Very simply, cream the butter, marmalade and vanilla together. Sift the powdered sugar over the top and stir until starting to become incorporated. Add the milk a teaspoon at a time until the desired spreading consistency.  Wait until the cupcakes are completely cooled before frosting. If you like, sprinkle the tops of the frosted cupcakes with the chopped nuts.  Wow, enjoy!


Tuesday, July 20, 2010

Hot Habanero Mac and Cheese

Never one to leave well enough alone, I even had to take dear old Fannie Farmer's classic baked macaroni and cheese and do something different with it. You see, I had this block of Cabot Hot Habanero Cheese around and part of a box of corkscrew pasta and got a brainstorm.  This was really, really good. Definitely not for you if a little heat turns you away from a dish. And definitely not for you if you're counting calories this week. Thankfully, I do not make these kinds of calorie-laden dishes very often. But there comes a time in everyone's life when nothing else will do to accompany that main course except a helping of crunchy-topped, creamy on the inside, and spicy through and through, mac and cheese.  Of course, you can make this recipe without the habanero cheese and enjoy it just as well.  

HOT HABANERO MAC AND CHEESE
3 cups of corkscrew shaped pasta
4 Tbs. butter
4 Tbs. flour
1 whole clove of garlic, peeled
1 1/4 cups milk
1 cup half and half
1/2 tsp. salt
1/4 tsp. pepper
1 1/2 cups sharp cheddar cheese
1/2 cup Cabot hot habanero cheese
1/2 cup Panko breadcrumbs
1 Tbs. butter, melted


  • Preheat the oven to  400 degrees.
  • Shred the cheese and pack into a 2-cup measuring cup. Set aside.
  • Toss the Panko breadcrumbs with the melted butter. Set aside.
  • Cook pasta according to package directions. Drain well and pour back into the pot. Set aside.
  • In a large saucepan melt the butter, and add the whole clove of garlic to flavor the sauce.
  • Add the flour, salt and pepper, using a whisk to stir until well blended.
  • Pour the milk and half & half in gradually, whisking constantly.
  • Bring to a boil, reduce heat and cook, stirring constantly, for a few minutes until very thick. Discard clove of garlic.
  • Remove saucepan from heat and stir in the shredded cheese until completely melted.
  • Pour this sauce over the pasta and stir to coat well.
  • Transfer the mac and cheese to a buttered baking dish (or just use a cooking spray)
  • Sprinkle with the Panko breadcrumbs.
  • Bake for 20 to 25 minutes or until the top is golden brown.


Sunday, July 18, 2010

Deviled Salmon Cakes with Lemon Yogurt Sauce

My sister Joanna contributed this recipe to my cookbook "Singingirl Cooks!"  You certainly can find pretty much this same recipe in most internet searches. But I put a little twist on the original to kick it up just another notch. These are absolutely delicious, and the amazing thing is that it uses canned salmon.  Oh, I know. The groans and grossness of pulling apart that salmon in the can to remove bones, etc. It's really not that big a deal. But if you prefer you can buy a piece of salmon, poach or bake it, let it cool and then flake it yourself to make about two cups. So, here is the recipe. The slightly long list of ingredients and the little bit of prep time is well worth the effort. I found that when I did an inventory to see what I needed to buy, I already had everything except a tiny can of corn, a container of yogurt and the parsley.

DEVILED SALMON CAKES WITH LEMON YOGURT SAUCE
1 large can of salmon, drained and bones removed
1/2 cup finely chopped onion
1/2 cup finely chopped celery
1 small jalapeno pepper, seeded and finely chopped
1/2 cup corn, canned or frozen
Salt and pepper to taste
1/2 cup mayonnaise
1 Tbs. Dijon mustard
1 tsp. pickle relish
1 tsp. lemon juice
1/2 tsp. Worcestershire sauce
1/4 tsp. paprika
2 big dashes of hot sauce
1 egg
1/2 cup cracker crumbs
1 cup Panko breadcrumbs
2 Tbs. butter
2 Tbs. canola oil

Flake the salmon into a bowl. Add the onion, celery, jalapeno, corn, salt and pepper. Mix together and set aside.

In another bowl, combine the mayonnaise, egg, mustard, relish, lemon juice, Worcestershire, paprika and hot sauce. Fold these ingredients into the salmon mixture along with 1/2 cup of cracker crumbs. Place the Panko on a plate.

Form the salmon into cakes. You can make six larger ones or eight smaller. Carefully coat them with the Panko. I found that holding the salmon cake and patting the Panko on one side, then flipping it over in my hand and patting the crumbs on the other side worked better than laying the salmon cake in the dish, the reason being the salmon is soft and might tend not to keep its shape. Do whatever way works for you.

Refrigerate the cakes on a plate loosely covered with saran and chill for about an hour.

Melt the butter and oil in a large nonstick skillet over medium heat. With your spatula, lift each salmon cake off the plate and add to the pan. Cook half of them about four minutes or so on each side, pressing down gently on them once or twice with your spatula. Turn carefully and fry the other side four minutes or so or until nicely browned.

To serve, place a big spoonful of the lemon yogurt sauce on each plate and spread it out a bit with the back of your spoon. Top with a salmon cake and garnish with parsley and lemon slice.  Enjoy!!

LIGHT LEMON YOGURT SAUCE
1 cup of plain fat free yogurt
1 tsp. freshly grated lemon peel
1 Tbs. lemon juice
1/4 cup chopped parsley
OR 1/2 tsp. tarragon
Salt and pepper to taste

Mix all ingredients together and keep chilled until ready to serve.  You can easily double this recipe, and I suggest you do!

Sunday, July 11, 2010

Delicious Onion Soup With Miniature Toasts and Parmesan Crisps


Why would I want to be making soup in south Florida in 90 degree weather? Better yet, why would I think any of my friends and family would want to make soup in such a torrential downpour of heat and sun? The answer is, I don't know why. I've just been thinking lately about making a good tasting onion soup after having had some so-so, rather salty onion soup in a restaurant last week with my mom. And, well, there is air conditioning keeping me cool inside for the venture. So, here it is.  Make this soup.  It's vegetarian (for all my non-meat eating friends and family.) It's delicious. It's topped with a wonderful miniature bread toast and a Parmesan crisp instead of that big blob of melted cheese. I know, I know. That's what's good about it, right? Try it this way, and let me know how you like it.


DELICIOUS ONION SOUP WITH MINIATURE TOASTS AND PARMESAN CRISPS
4 heaping cups of onions, peeled and thinly sliced
3 Tbs. butter
1 Tbs. Worcestershire sauce
1/2 cup sherry (you can use bottled cooking sherry if you must, but don't tell anyone)
4 cups of vegetable broth (see below for my tip)
Freshly grated Parmesan cheese
Packaged Miniature Toasts

Melt the butter in a large pot. Add the onions and cook and stir often over low to medium heat until the onions are fully softened and starting to brown. This process will take at least 45 minutes to one hour. There is no rushing this step.  Increase the heat to high, add the Worcestershire and sherry and cook for a minute or two, or until the sherry reduces. Stir in the 4 cups of broth, lower the heat and simmer another 20 minutes or so.  

Here's my tip for the broth.... You can use cans of broth if you like. In this recipe I used a seasoned roasted vegetable cooking base. Find them in the canned soup aisle, Better Than Bouillon is the one I used.  They really are much better than bouillon, less salty, and much more flavorful.  The jar costs a few dollars, but you'll find  that you'll be seasoning the water with it when you make rice, pasta, other soups, sauces. Use 1 tsp. per cup of water (you'll need 4 tsp. for this recipe.)

While the soup is simmering, make the crisps.  Preheat the oven to 375 degrees and set the oven rack in the middle. Finely grate the Parmesan and use 1 Tbs. per crisp. Dump it onto a well oiled baking sheet (I used cooking spray) and then with the back of your spoon flatten the mound out a little. Grind some pepper on each one. Don't crowd, maybe only 6 to a baking sheet. Bake for 8 minutes approximately. 
Remove from oven and carefully slide your spatula around the edges and remove each one to a rack.  My pictures above show the process, and you CAN do this! It was actually very easy, and I surprised myself.  This is Alton Brown's recipe from Food Network.  They are soooo delicious! And no carbs! Ladle the soup into your bowl and set the bowl on a serving dish.  


Surround the bowl with one or two toasts and two or three crisps and let the lucky recipients assemble their own garnish.  Enjoy!!! And please say hello in the comment section below. 


Tuesday, June 29, 2010

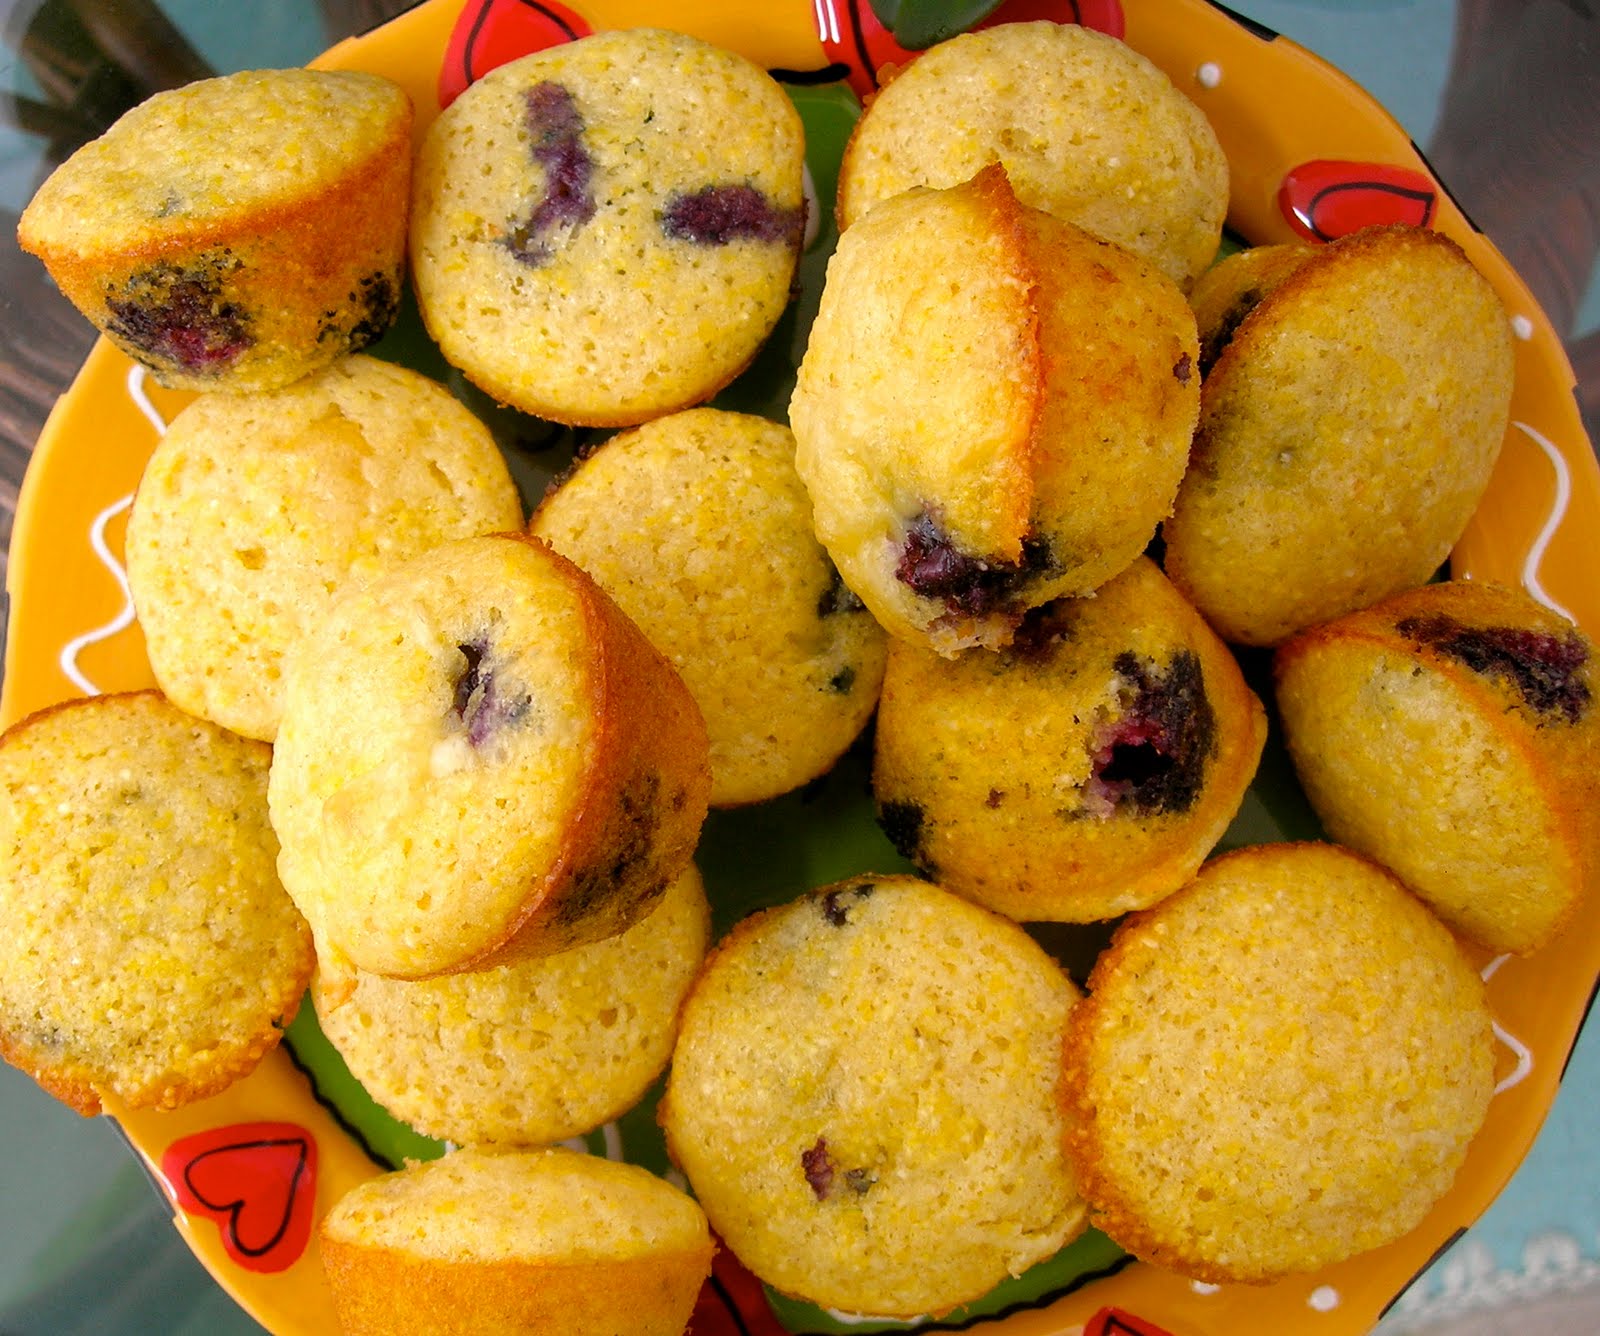
Blueberry and Cheddar Cornmeal Mini-Muffins

The temptation was there.  Blueberries, finally 2 for $3.00.  They have come down in price as far as they will probably go this season.  Not that I didn't pay more for them a few weeks ago to make that incredible Fresh Blueberry Pie.  You made it, didn't you? Well, I know some of you did.  Okay, here's my corn muffin recipe tweaked just a little bit to include blueberries and a little zip from some cheddar cheese. I used sharp white cheddar, but you can use the orange cheddar. This recipe calls for buttermilk, and I don't know about you but I never, repeat, never have buttermilk in the house. If you have a recipe that calls for buttermilk, like this one, measure 1 1/2 Tbs. of cider vinegar into a measuring cup and add milk to measure one cup.  Let it stand for a few minutes. It actually smells like buttermilk, and you will never notice the difference in your recipe. Of note, I only use this method for baking. If you're making a soup that calls for buttermilk, buy the real thing.


BLUEBERRY AND CHEDDAR CORNMEAL MINI-MUFFINS
1 stick of butter
2 eggs
1/2 cup sugar
1/2 tsp. baking soda
1/2 tsp. salt
1 cup buttermilk
1 cup coarse or medium yellow cornmeal
1 cup sifted flour
1/3 cup shredded sharp cheddar cheese
2/3 cup blueberries, rinsed and dried

Preheat your oven to 375 degrees. Melt the butter and pour into a large mixing bowl. Let it cool for a few minutes, and then add the two eggs, beating well. Stir in the sugar, baking soda, salt and buttermilk. Stir in the cornmeal, flour, and cheese.  Fold in the berries. Coat a mini muffin pan with cooking spray, and fill each mini-muffin cup with about a quarter of a cup of batter, making sure you've got at least two berries in each muffin.  The batter should come to the top of the cup for a nice full-sized muffin. Do not use paper liners.  Bake for about 13 to 14 minutes or until a toothpick comes out clean. Makes 30 mini muffins.  These muffins are so moist with the addition of the blueberries and cheese and the slightly crunchy texture of the cornmeal, you won't need butter. Just pop the damn thing in your mouth and get over it.


Friday, June 18, 2010

Easiest & Best Fresh Blueberry Pie

Oh joy.... blueberries are back in season again. An opportunity to make this pie.  This recipe came from my mother, who I believe got it from our next door neighbor many moons ago. She was an expert pie baker, our neighbor. Once you make this, you will never look at another recipe for blueberry pie. I'm serious. Just to show you how serious I am, I'm offering a money back guarantee.  Wait a minute. I'm not selling you anything. How can I offer a money back guarantee?  Listen, July 4th is around the corner. Good excuse to make this. But don't wait until then. Make one now and see for yourself. The combination of fresh and cooked berries with the slightly tart taste of lemon.....all poured into a pre-baked and cooled deep dish pie crust, then topped with toasted coconut, and chilled!  I never met a frozen pie crust that I didn't like. Of course, if you're a purist then roll out your own crust from scratch.  Fifteen or twenty minutes from start to finish (except for the chilling time), the pie serves six generously or eight not so generously.

EASIEST AND BEST FRESH BLUEBERRY PIE
3/4 cup sugar
2 1/2 Tbs. cornstarch
1/4 tsp. salt
2/3 cup water
3 cups blueberries, divided
2 Tbs. butter
1 1/2 Tbs. lemon juice (about half a lemon)
1/3 cup coconut, toasted (optional)


Spread the coconut onto a sheet of foil and toast in a 350 degree oven, stirring occasionally, until browned and sweet smelling. Remove from oven and allow to cool.

Mix the sugar, cornstarch, salt, water and 1 cup of the blueberries together in a saucepan over medium heat. Bring to a boil and cook until the berries have "popped" and the mixture is thickened, bubbly and dark purple in color. Remove from heat and stir in the butter until melted, then stir in the lemon juice and then fold in the remaining two cups of berries.

Pour into a pre-baked, cooled pie crust, one that you've slaved over yourself, or a frozen deep dish pie crust.

Sprinkle the toasted coconut over the top of the pie. Chill until firm. Serve with whipped cream or vanilla ice cream.


Friday, February 12, 2010

Baked Birds Nests

How many different ways can we make this egg in toast thing, right? For years I've been tearing a small hole in the middle of a slice of bread, frying it in the pan, flipping it, etc.  Here is yet another remarkable way to prepare the incredible, edible egg. The really great thing about making them this way is that you can prepare several of them all at the same time, and everyone can have their eggs and eat them too, all at the same time.  Did I just use the phrase "all at the same time" twice in one sentence? Make these this weekend!! Okay, here is what you do:

Baked Birds Nests
Preheat the oven to 375 degrees. Decide how many you're going to make, usually two per person. Coat a muffin pan very well with cooking spray. Using soft wheat bread, trim the crust from the edges, and gently push each slice of bread into the muffin pan to create a cup. Melt a couple tablespoons of butter in the microwave and brush the edges and insides of the bread with a pastry brush. Or if you're tired this morning, just spray the edges of the bread with cooking spray, which works just as well.  Now, break one egg into each bread cup.  Bake for approximately 15 minutes or until done to your liking. They will look slightly opaque on top after 15 minutes but are really done at that point.

Remove the muffin pan from the oven. Slide a knife around the sides of the muffin pan to remove each piece. They will come out of the pan perfectly easily and have the beautiful little shape of a muffin. Serve and season with salt and pepper.

I've decided that a medium egg fits into the bread cup better than a large egg. It will work fine using the large but may overflow a bit, which doesn't really affect the overall outcome, and now that I'm talking about it, I'm wondering who buys medium eggs anyway, right?

Great Tip! The soft 40 calorie wheat bread works great and will keep you from feeling too guilty about the carb thing.

Thursday, February 4, 2010

Cheddar and Jalapeno Corn Muffins

The decision is final, at least for two of the items to serve on Superbowl Sunday.  Chili and Cornbread. But since I didn't have all the ingredients for the chili at this very moment, I decided to make the corn muffins and test them out instead. Oh, are they good!!! Here's the recipe....

CHEDDAR AND JALAPENO CORN MUFFINS
1 stick of butter
2 eggs
1/2 cup sugar
1/2 tsp. baking soda
1/2 tsp. salt
1 cup buttermilk
1 cup coarse or medium yellow cornmeal
1 cup flour
1/2 cup shredded sharp cheddar
2 Tbs. diced jalapenos (I buy a jar already to rock)

Melt the butter in the microwave in a large microwavable bowl. Let it cool for a few minutes, and then add the eggs, beating well. Stir in the sugar, baking soda, salt and buttermilk. (See my tip below for making a great substitute for buttermilk.)  Stir in the cornmeal, flour, cheese and jalapenos. Save a few sprinklings of cheese for the tops of the muffins.

Evenly distribute the batter among 12 muffin cups that have been coated with cooking spray. Don't use paper muffin liners. Sprinkle the tops with the remaining shredded cheese. Bake in a preheated 375 degree oven for about 20 to 23 minutes or until a toothpick comes out clean. Run a knife around the sides of the muffins to remove from pans and cool on a rack.

Great Tip: For recipes like this that call for buttermilk, and who has buttermilk just hanging around in their refrigerator, measure 1 1/2 Tbs. cider vinegar into a measuring cup and add enough milk to make 1 cup. Let this stand for a few minutes while you're preparing the muffins, and proceed with the recipe. It actually smells like buttermilk, and you will never notice the difference in your recipe. This method works well for things like these muffins. I have tried this with soup recipes that call for larger amounts of buttermilk and failed miserably!!! For soups and sauces that call for buttermilk, I would stick with the real thing, but for these muffins this substitution works beautifully!

Friday, December 25, 2009

Cranberry, Pistachio and Cardamom Oatmeal Cookies

Red and green spotted cookies. I was thinking Christmas, festive, attractive, soft, delish. I came up with this mix for oatmeal cookies, and guess what? You guessed. I snuck in the cardamom again. Oh, they ARE really good.  Unfortunately I have posted this after the fact, that being in time to put these colorful cookies on a platter for the guests. But I recommend you try these anytime, right now, tomorrow maybe, and feel good knowing the oats are in there to help lower your cholesterol, and the pistachios are one of the fewest calorie nuts you can eat! 


3/4 cup flour
1/2 teaspoon ground cardamom
1/2 teaspoon baking soda
1/2 teaspoon salt
1 cup quick cooking oats
1/2 cup dried cranberries
1/2 cup sugar
1/2 cup light  or dark brown sugar
1/2 cup shelled pistachios
1/2 cup (1 stick) unsalted butter, softened
2 teaspoons vanilla extract
1 egg


Preheat the oven to 350 degrees. Stir together the flour, cardamom, baking soda and salt and set aside. In another bowl, beat the butter and the sugars together. Stir in the vanilla and egg and mix well. Add the flour mixture all at once and stir to combine. Add the oats and mix again. Lastly, add the cranberries and pistachios which have been chopped, either by hand or in your food processor, leaving nice sized pieces of fruit and nut.


You can chill this mixture now until later, or start baking now.  


Spray a cookie sheet with cooking spray. Drop cookie dough by the tablespoon, 12 on a sheet, and bake for ten minutes. Remove to a rack to cool. Makes about 3 dozen. 

Thursday, December 17, 2009

Peanut Butter Cup Cookies

Could I eat just one of these cookies? I think not. That's why I made some of them with semi-sweet dark chocolate kisses.  I figured dark chocolate is good for you, right? So I feel half as guilty by having eaten one with dark chocolate and one with an unbelievably yummy Reese's miniature peanut butter cup. Oh, whoever came up with this idea, one thousand thank yous!!!  Now, I only changed the recipe up a bit, I can never leave well enough alone. I used a favorite peanut butter cookie recipe of mine, and rolled the dough in sugar before baking. That's all!  Get to the store and buy these ingredients and start baking. You'll be happy you did. I  don't want to get graphic, but I brought these to my hair salon, and the response was that these cookies rivaled a sexual experience.  S'all I'm sayin'.


PEANUT BUTTER CUP COOKIES
1/2 cup butter, room temperature
1/2 cup sugar
1/2 cup brown sugar
1/2 cup smooth peanut butter
1 egg
1/2 tsp. vanilla
1 1/4 cp. flour
3/4 tsp. baking soda
1/2 tsp. baking powder
1/4 tsp. salt
40 Reese's miniature peanut butter cups OR
half and half Reese's and Hershey's Kisses


Cream together the softened butter and sugars. Mix in the vanilla and peanut butter, then the egg. Mix together all the dry ingredients (flour through salt) and add all at once to the creamed mixture, mixing very well. Refrigerate for at least an hour, overnight if you want to do this at another time.


When ready to bake, preheat the oven to 375 degrees. Shape dough into balls about the size of a walnut, maybe a little smaller. Roll in a dish of granulated sugar and place each ball into an ungreased mini muffin pan. Bake for 8 to 8 1/2 minutes. Remove from oven and immediately place a peanut butter cup into the center of the cookie cup, pressing down gently so the candy is flush with the height of the cookie cup. Allow to cool in the mini muffin pan for a few minutes, and they will come out of the pan much easier. You can give them a nudge by sliding a knife carefully around the outside of the cookie to help it out, but you shouldn't have any problem. If you're using Hershey's Kisses, follow the same instructions for placing the candy into the cookie cup. This recipe makes around three dozen, give or take a few. 


Big Tip Here! Unwrap the candies and place them in the freezer while preparing the dough. It makes a big difference to have the candy be slightly or completely frozen before placing on the hot cookie. 

I thought twice about posting a picture with this reeeealllly old mini muffin pan, but I couldn't bring myself to PhotoShop out the worst of it right now, and I wanted you to see what the cookies looked like in the pan. If anyone wants to send me a new mini muffin pan, I'll give you my address ;-)


Friday, December 4, 2009

Candied Cardamom and Orange Mixed Nuts

I've got a great new recipe for your nut dish this holiday season. Don't buy Planters or any other kind of store bought nuts this time. Get yourself some oversized bags of nuts at Costco or Sam's Club or whichever store of that type is popular in your area, and make your own! Perfect for gift giving, if you can manage to put any aside before devouring them all yourself. And great news.... I've found yet another use for that expensive jar of cardamom that I bought a while back!  These are sweet, crunchy and downright addictive.

CANDIED CARDAMOM 
AND ORANGE MIXED NUTS


1/4 cup butter
1/2 cup plus 3 Tbs. sugar, divided
1 cup unsalted pecans
1 cup unsalted walnuts
1 cup unsalted almonds
2 tsp. cardamom
1/2 tsp. or more orange peel       

Melt the butter in a large pan over medium high heat. Add the 1/2 cup of sugar and stir until the sugar is completely dissolved. Meanwhile, mix the remaining 3 Tbs. of sugar with the cardamom and orange peel and set aside. As you can see, I took the easy way out and used a jar of Spice Islands orange peel. But if you like grating, by all means grate away! When the sugar is dissolved, still over the medium to medium high heat add the 3 cups of nuts, cooking and stirring for about 5 minutes until toasted and well coated with the butter/sugar mixture. Don't allow the nuts to burn. Pour the nuts into a large bowl and add the reserved sugar and spice mixture. Stir well to coat evenly.  Dump this mixture onto a foil lined cookie sheet and break apart with the back of your spoon or spatula to, well, to break them apart.... duh me.  When they are cooled, they will separate, yeah, that's the word I was looking for... they will separate easily and be ready to fill a nut dish or add to a container for gift giving. Yum.... wait till you taste these!