
 Are you wondering what the heck Mandel Bread is? It's a biscotti cookie with a fancy name! And in Yiddish it literally means almond bread. I haven't posted a recipe for nearly a year. Shocking. This time last year I was in Hawaii and working through the grief of losing my mother. This year, as we approach fall....coming soon...I hope...., I was thinking about something you could arrange on a platter with other beautiful sweet treats for the Jewish New Year. I found my mother's recipe, in her handwriting, and with a few tweaks here and there, I'm going to share it with you. Now, you don't have to celebrate the Jewish New Year or any other Jewish holiday to enjoy Mandel Bread. After all, it's just like a biscotti. And if you've ever dug into your pocket at Starbucks or another coffee shop to pay $1.75 for one lousy, little biscotti to dunk into your coffee, then you might be interested in trying this really easy, really yummy recipe. I'm just getting started folks. Today Chocolate Chip and Almond. Tomorrow....I already know! But it's a secret until my next post. Try this soon and let me know in the comment section how it tastes with your morning cup of coffee or tea.
CHOCOLATE CHIP AND ALMOND MANDEL BREAD
3 1/4 cups of all purpose flour
4 tsp. baking powder
1/2 tsp. salt
1 cup oil*
3 eggs
1 cup sugar
1 tsp. vanilla extract
1/2 tsp. almond extract
3/4 cup chopped almonds
1/2 cup chocolate chips
In a large mixing bowl with an electric mixer, beat three eggs until light and fluffy. Gradually add the sugar. Add the oil in a slow steady stream, continuing to beat well with the mixer. Add the extracts.
Mix the rest of this dough by hand by adding the sifted dry ingredients, the chopped almonds and lastly the chocolate chips. The mixture should be looking very shiny and should be coming together very nicely.

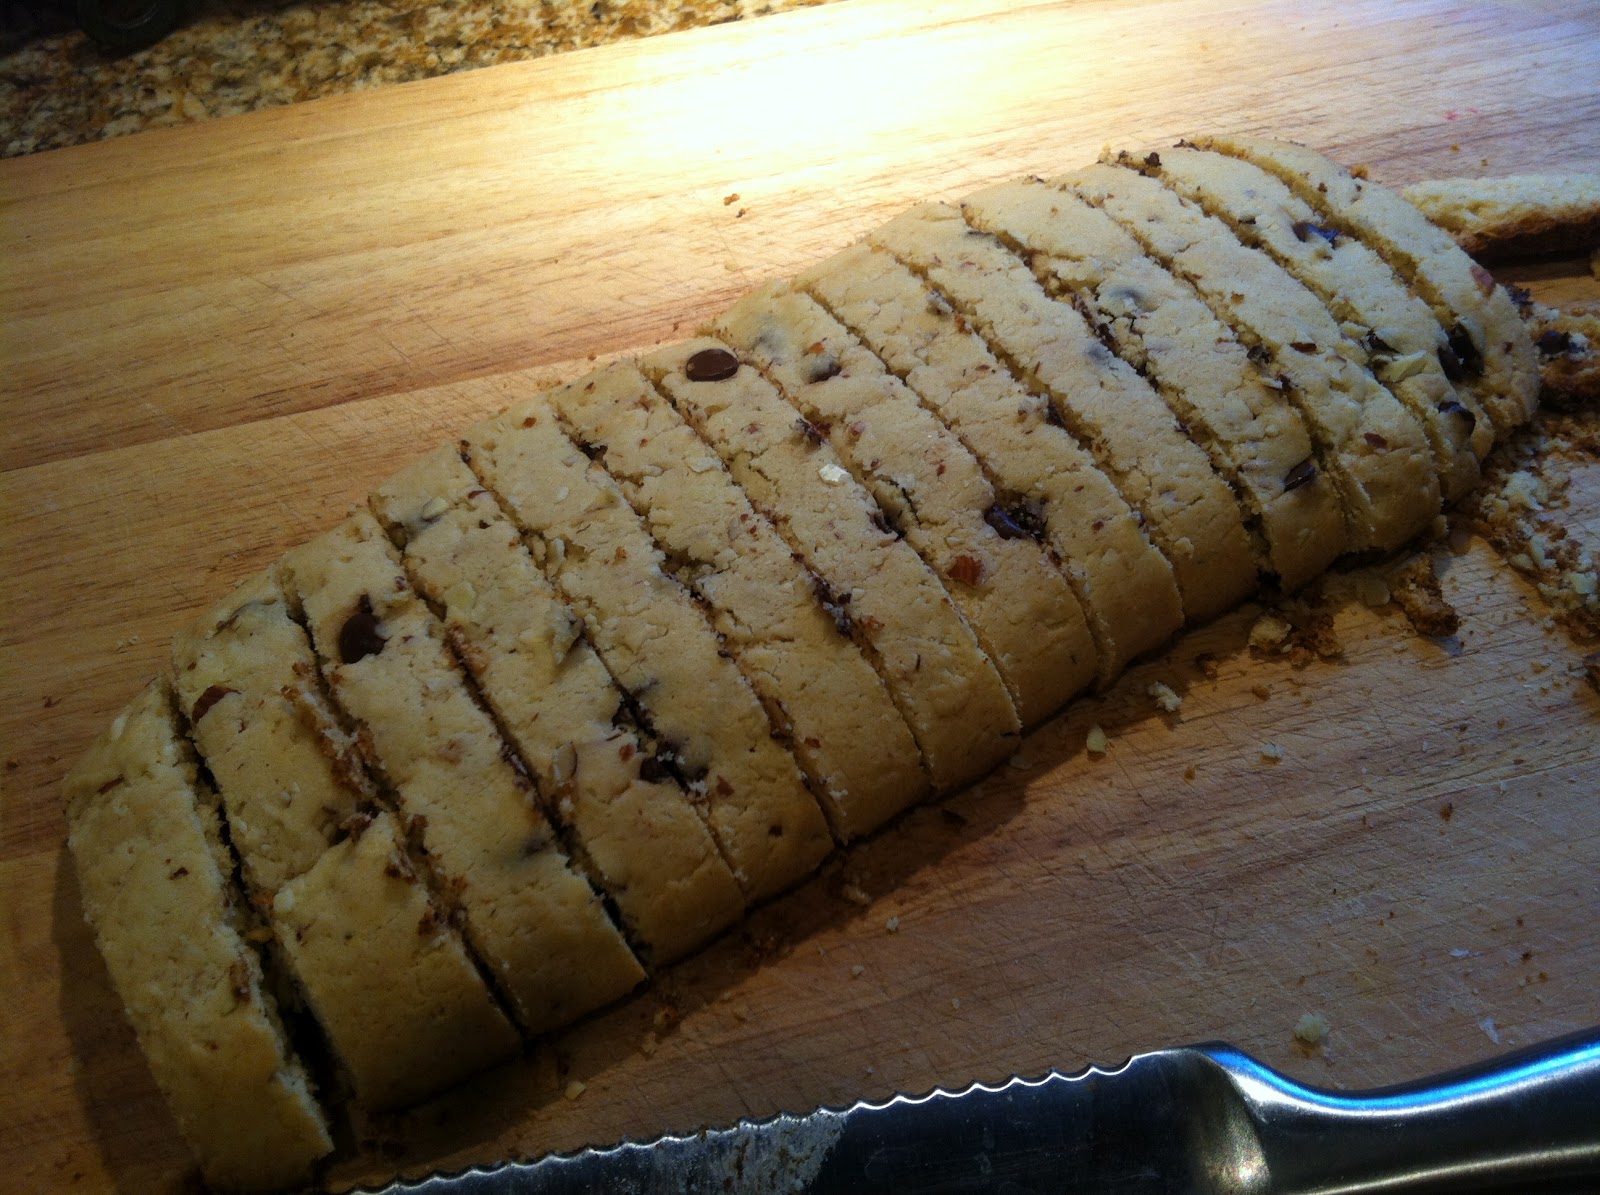
 Preheat the oven to 350 degrees. Line a cookie sheet with waxed paper. Divide the dough in half and form each half into a log approximately 12 inches long or so, and 3 inches wide, and no more than an inch or so high. Place the cookie sheet in the preheated oven, and bake for about 25 minutes. Remove the pan from the oven and allow the breads to cool right in the pan for at least 20 minutes. When they're cool enough to handle, carefully remove each bread from the waxed paper and place onto a cutting board. Using a serrated edged knife, slice into approximately 14 to 15 slices. Do one loaf at a time. Let the other one just sit there. Place these slices cut side down onto the same cookie sheet, no waxed paper. And bake for another 15 minutes or so, turning the slices over half way through. This second baking dries the cookie out beautifully. It may still seem sort of soft when you remove them from the pan, but they become crumbly and delicious as they cool. Repeat this second baking process with the other loaf.
Some of my pictures leave much to be desired, but I wanted to include them anyway so you can see for yourself what these things look like in the preparation stage.
*A note on oil - I've been into using Extra Virgin Organic Coconut Oil lately. Delicious aroma aside, its ability to be substituted just about anywhere you would use oil makes it a perfect choice for a heart healthy oil with its cholesterol lowering properties. So, eat your coconut oil!!! I'm pretty sure my mother didn't use coconut oil, but we can.


