Wednesday, December 8, 2010

Potato and Cheddar Cheese Soup

It has been so long since I posted anything to this blog. The last time I looked I was trying to clean things up a little bit and make for a more enjoyable read.  I didn't get too far.  My friend, the blog wiz over at Raisin Toast helped me a bit, and then I sorta kinda gave up, temporarily.  But today, with all this cold and downright frigid weather going around, I thought of soup, comforting, warm, delicious Potato and Cheddar Cheese Soup.  If you own my book, the recipe is there. Today, however, I did make some changes. So if you do decide to make this, and I hope you will, print out my recipe here today and compare it to what the book says. I think it's an improvement.


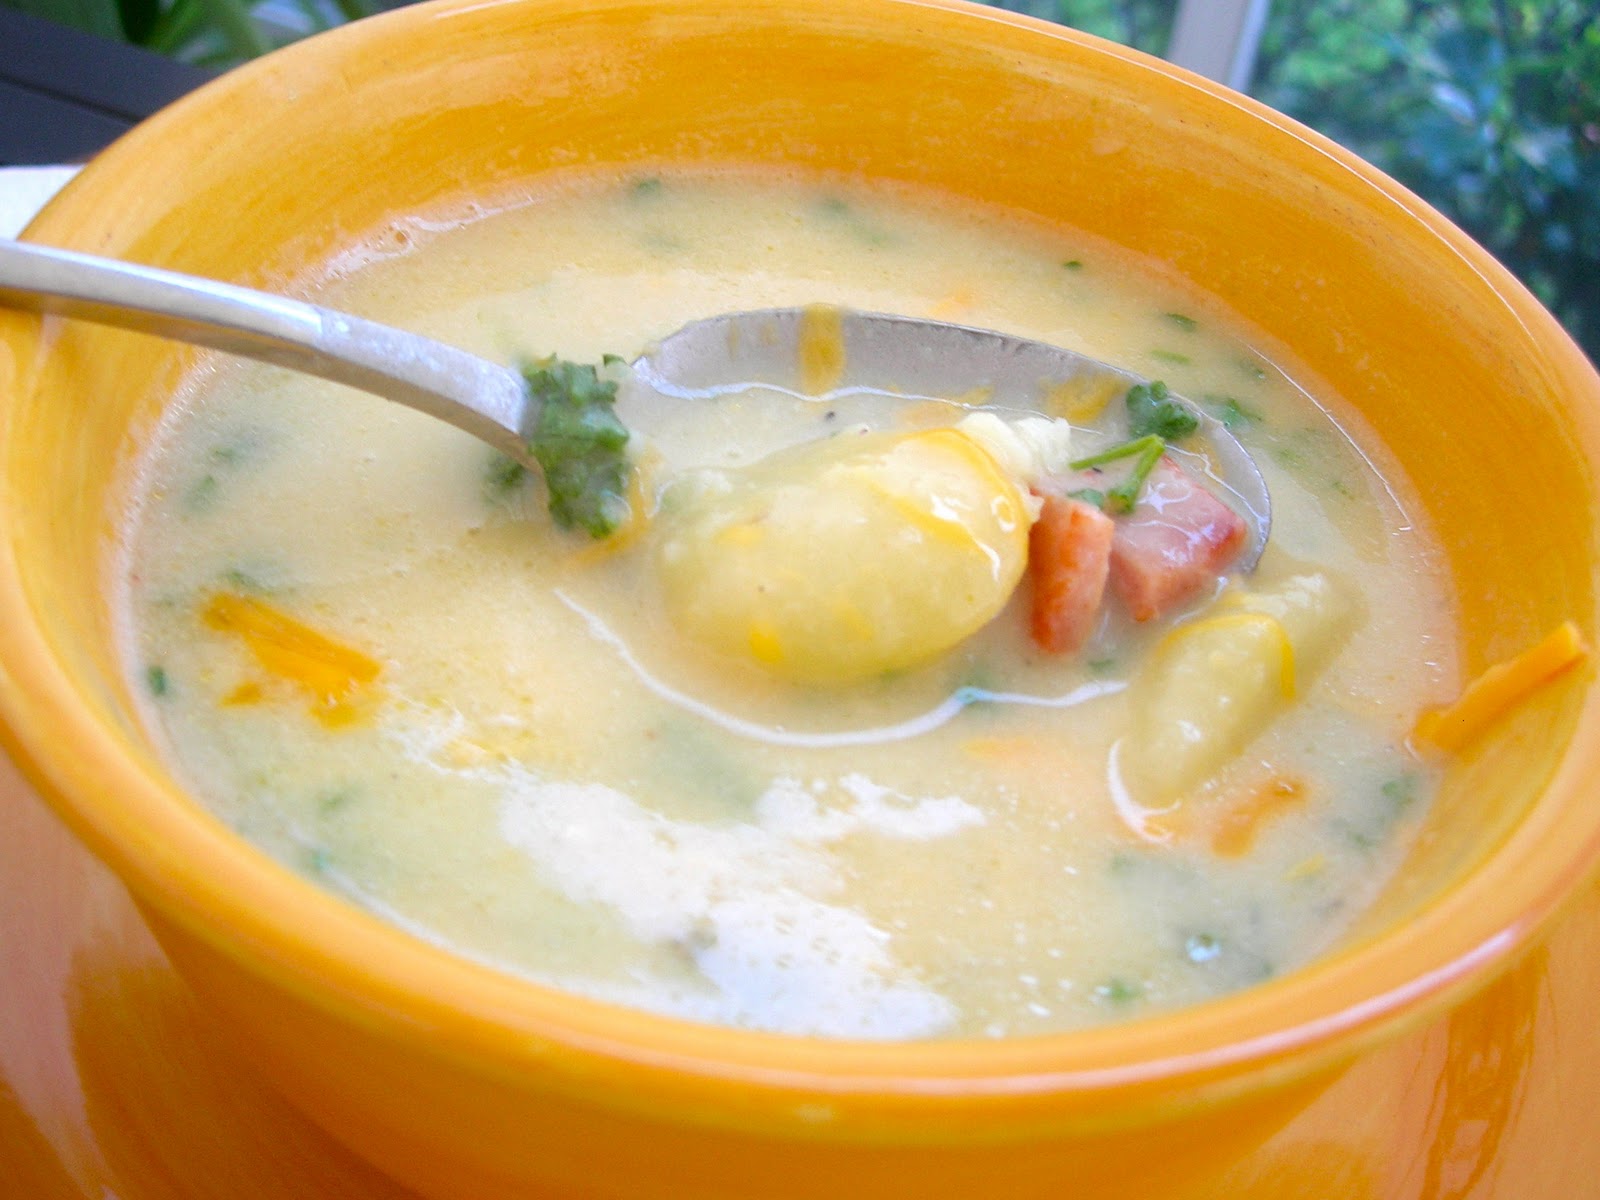
POTATO AND CHEDDAR CHEESE SOUP
Heaping 4 cups of sliced, peeled potatoes (by the picture it does end up being more like 6 cups) I used 5 big potatoes
2 cups of water
1 cup of chicken broth
2 tsp. salt
1 medium onion, chopped
1 clove of garlic, chopped
1 Tbs. oil
3 cups of milk
1 cup of chicken broth
Freshly ground black pepper to taste
1/2 cup of chopped fresh parsley
1 pkg. Canadian bacon, chopped, there's usually 5 or 6 slices in a pkg., use the whole thing
2 Tbs. butter
1 cup cheddar cheese, shredded
Chopped green onions and extra cheddar for garnish

Cook the sliced potatoes in the two cups of salted water and one cup of the chicken broth until soft, about 20 minutes.  While the potatoes are cooking, saute the onion and garlic in the oil until soft and beginning to brown. When the potatoes are soft,  remove half of the sliced potatoes with a slotted spoon to a bowl. Place the other half of the potatoes, all of the cooking liquid, the sauteed onion and garlic into your food processor or blender. You might have to do this in two batches. Blend until smooth and looking a lot like mashed potatoes.  Return all of this to the pot with the reserved potato slices and add the 3 cups of milk and the other 1 cup of chicken broth, along with the chopped parsley.  Add pepper and salt to taste. Give it a good stir, reduce the heat to low and cook, stirring occasionally for another 15 to 20 minutes. Do not boil.

In the meantime, melt the 2 Tbs. of butter and add the chopped Canadian bacon. Fry over medium high heat until the bacon is nicely browned and getting a crisp, blackened look on the edges.

Stir the shredded cheese into the soup, stirring until melted. Add the bacon and all the butter from the pan. Cook and stir until everything is heated through, but do not boil.

To serve, ladle the hot soup into a bowl and garnish with chopped green onion and extra cheddar.

You will not believe how delicious this soup is. I promise you it will hit the spot on these cold days. This soup gets its great flavor from those sauteed onions and all that flavor from the lean Canadian bacon. And no thickener was used, as it gets its rich thickness from the mashed potatoes!  Leave a comment for me and let me know how you liked it.  Baby it's cold outside. Stay warm everyone!!!

Sunday, October 31, 2010

GROWING PAINS

Hi Kids!  Just want to send a little note your way to let you know I've been experimenting and making some changes to the blog design.  My friend, Susan, over at Raisin-Toast has been helping me along the way.  But in the meantime, I'm running into a couple of head scratchers.  If you subscribe to the blog and have been receiving posts that you may have already received in the past, please forgive me for the annoyance. I'm trying to figure it out myself!  Hope to have it worked out soon, and I appreciate your patience!

Since it is Halloween today, here's wishing everyone a spooky day!
Peace and Love from SingingirlCooks (aka Beth)

Tuesday, October 26, 2010

Chocolate Crusted Pumpkin Cheesecake Pie

Whew... that's a big name for this little pie.  But I couldn't just call it a pumpkin pie.  One member of my household called it a Hybrid Special. I thought that was pretty funny. But who would find my pie searching for Hybrid Special?  If you own my cookbook, you know that I feature this pie in the dessert section, except that in that recipe I use a regular pie crust and glaze the top of the cooled pie with a maple syrup concoction.  Sounds pretty good, right?  It is.  But not being able to leave well enough alone, I decided that these four things, chocolate, pumpkin, orange and cream cheese would taste pretty good together.  And they do.  Try this one of these days before the holidays and decide for yourself if offering a variation on a theme would be a good idea.  I offered a choice last Thanksgiving, and everyone loved both the traditional pie and the Hybrid!  Here's the recipe.

CHOCOLATE CRUSTED PUMPKIN CHEESECAKE PIE
1 chocolate pie crust (such as Oreo brand)
1 8 oz. pkg. of cream cheese, softened (I used the Neufchatel 1/3 less fat)
1/4 cup sugar
1/2 tsp. vanilla
1/2 tsp. freshly grated orange peel
1 egg

1 1/4 cups of canned pumpkin (don't stress over the little bit that's left in the can)
1 cup evaporated milk (use the rest for your coffee or cooking)
1/4 cup brown sugar
1/4 cup sugar
2 eggs, beaten
1 tsp. cinnamon
1/2 tsp. ginger
1/4 tsp. cloves
Dash of salt
Whipped cream for garnish


  • Preheat the oven to 350 degrees.  Place the pie crust on a cookie sheet and set aside.
  • Combine the cream cheese, sugar, vanilla, orange peel and egg. Beat on low speed with a mixer until smooth. Spread onto the bottom only of the pie crust and even it out with the bottom of your spoon.
  • Combine remaining pie ingredients and mix very well until nice and smooth. 
  • Carefully pour this mixture over the cream cheese mixture. You might have a little bit left that just won't fit.
  • Place pie in the oven on the cookie sheet to prevent a spill and bake for around 60 minutes or until a tester comes out clean.
  • Remove pie from oven and cool on a rack completely.
  • Chill and garnish with whipped cream. A few chocolate sprinkles on top of the whipped cream, or a couple of candy corn arranged nicely would look great!  Enjoy!!!


Note ~ you can substitute 1 3/4 tsp. of pumpkin pie spice for the individual spices above.

Saturday, October 23, 2010

Cauliflower Quiche

Does the sound of cauliflower just not thrill or excite you very much? Give it a chance!  I decided to experiment tonight. I had a whole head of cauliflower in my refrigerator just begging to be used for something or throw it out!  Here's what I came up with:

CAULIFLOWER QUICHE
2 cups cauliflower florets, broken up into small florets
1/3 cup of sliced or slivered almonds
1 Tbs. butter
2 green onions, tops and greens sliced thinly
1 small clove garlic
2 cups of cheddar cheese
1/4 cup Asiago cheese OR Parmesan
3 eggs
1 1/2 cups of milk (try not to use skim in a quiche)
1 tsp salt
Freshly ground pepper to taste
1/4 tsp. of oregano
2 Tbs. flour
1 big spoonful Dijon mustard
1 nicely frozen, ready to use, why make your own, deep dish frozen pie crust!! lol


  • Steam the cauliflower florets in the microwave for about 4 minutes until soft. Drain well and set aside. 
  • Melt the butter and brown the almonds, remove them from the pan to a small dish and set aside.
  • Add a bit of olive oil to the same pan and saute the green onions and garlic for a minute or two to soften.


Assemble all of this on a baking sheet on your counter.

  • Using a pastry brush, spread about a Tbs. of Dijon mustard around the bottom and sides of the crust.
  • Layer the cauliflower in the bottom of the pan.
  • Top with your sauteed onion/garlic mixture, and then distribute the shredded cheddar over the vegetables.
  • Sprinkle half the toasted almonds over the top of the cheese.
  • Whisk together the 3 eggs, milk, salt and pepper, oregano, and flour and pour over the top.
  • Sprinkle with the Asiago or Parmesan and sprinkle with the remaining almonds.
Carry it over to your oven which has been preheating at 375 degrees. If some of the filling does not fit, don't stress.  Bake for about 55 minutes, maybe a few minutes less. The top will be beautifully browned, puffy, and delicious looking! I am serving this with a combination salad of romaine, fresh spinach, tomatoes and fresh blueberries with raspberry vinaigrette. But if blueberries are not in season, switch that out for diced pears or apple.


Have you tried my Broccoli and Swiss Cheese Quiche ???  It is delicious!  This recipe and a hundred pages of great recipes, stories and photos are included in my cookbook, "Singingirl Cooks!" It's for sale.  If you don't own a copy and would like to, ask me!
Very, very good!


New Fashioned Potato Salad


This is a maiden voyage for me with blogging. I'm sure this initial post is going to look quite silly and amateur to just about everyone. But give me a minute, and I will get it together. My friend, Susan, will be rolling on the floor over this, but I'm trying. Anyway, on to this recipe.

Don't those store bought containers of potato salad just leave you a little cold? Tons of mayo and no personality??  Kick up your potato salad a notch this holiday weekend and try this recipe. Finely chopped colorful vegetables give this great flavor.  I used my food processor to achieve the really small chop for the vegetables. If you don't have a processor, just chop away by hand. The overall   result should be uniformly small pieces of vegetables resembling confetti that you will mix into the salad. No one wants to chomp into a huge piece of jalapeno or onion. 


Start with:
3 to 4 lb. of potatoes
1/2 of a red onion
1 small jalapeno, seeded
1 medium carrot
1 medium stalk of celery
1 clove of garlic
1/2 cup of fresh parsley
1/2 cup of mayonnaise
1/3 cup of sour cream
1 1/2 Tbs. Dijon mustard
1/2 tsp. seasoned salt (such as Emeril's Essence)
Freshly ground black pepper and extra salt to taste


Boil the potatoes whole with the skin on until firm tender, adding a generous amount of salt to the boiling water. Drain and allow to cool until you can handle them.


Place the onion, jalapeno, carrot, celery, garlic and parsley in your food processor and process until they are chopped very small. Place in a large mixing bowl.


Mix the mayo, sour cream, mustard and seasonings together.


When the potatoes are cool enough to handle, remove the skins. This is a whole lot easier to do after they're cooked. Cut them into edible sized pieces. You should have about six or seven cups of potatoes. Dump these into the large bowl with the vegetables and toss gently to mix. Pour the dressing over the warm potatoes and vegetables and gently mix again. Check for seasonings. Cover and chill.


Enjoy everybody. Have a safe and relaxing holiday weekend. And don't give up and buy that store bought stuff, EVER! 


If you like this recipe, please let me know by leaving a comment for me, and thanks for stopping by. I need encouragement to go on! And from time to time, I will bother you about my cookbook Singingirl Cooks! which is proudly for sale and full of recipes, pictures and stories just like this. Ask me about it.

Tuesday, October 19, 2010

Homemade Corn Tortilla Chips...Yum!


Yesterday was Taco Salad night.  We love that around here. And even though everyone has their take on a taco salad, I'm offering up my method here, along with the recipe for awesome, crunchy, better than store bought, thick, restaurant style tortilla chips. I posted my recipe for Chicken Taco Salad back in July. You can click on this link, and it'll take you to the recipe. I make Salsa Lime Dressing to go with my salads, and it's delicious, recipe for that is included on the same page.   And of course I don't forget my new fav cheese of choice in the salad, Cabot Hot Habanero and Seriously Sharp Cheddar. Seriously hot and seriously good.

I like a crunchy texture and always add crushed up, store-bought tortilla chips but decided to try a recipe I had seen on line for homemade chips. Fun to make, your kids will enjoy making the tortillas into shapes and seasoning them.  I made some of mine with just kosher salt and garlic powder and some with Emeril's Seasoning. Here's the simple recipe....

HOMEMADE CORN TORTILLA CHIPS
1 1 lb. pkg. 6" diameter corn tortillas
Vegetable oil
Your imagination with seasonings

Preheat the oven to 400 degrees. With a pizza cutter or a sharp knife, cut the tortillas into wedges. One 6" tortilla with make 4 tortillas. Place on a cookie sheet that has been coated with cooking spray.  Place a small amount of oil (I wouldn't use olive oil for this) into a dish, and brush each tortilla lightly with a little oil.  Sprinkle each with your choice of seasoning. I know someone who used Ranch Seasoning Mix with some powdered garlic, and the chips came out tasting better than a Dorito!  After seasoning, bake the chips for 10 to 11 minutes. No need to turn!  Remove from the oven and transfer to some paper towels.  While they are warm, give them an extra little hit of seasoning.  Delicious! and Baked not Fried!!!

Enjoy, and tell me who didn't like these!!!

Seasoning Tip~ Another great idea for seasoning ~ Cinnamon and sugar!

Sunday, October 10, 2010

My Not-So-Famous Turkey Chili (Yet)


October, football, falling leaves, cooler weather. Only two of those things apply to me here in south Florida. Be that as it may, the weather this week did actually take a plunge into the 70s! (Is anybody laughing right now?) So I thought a cool weather recipe would be in order. My last blog entry, Mushroom Chowder, was kind of a cool weather recipe and a huge hit as well. With all the talk about it from my friend, Cathy, and how it came in second place in her church contest, I decided I had to make it this past week and remember what I did that made it so good.  You gotta try it.   And even though this will be another meal-in-a-bowl type of recipe, I'm doing it anyway because who doesn't need another chili recipe to consider?

The inspiration for the recipe that I use came from Alice's Restaurant Cookbook, which I purchased in 19...., well back a long time ago. Alice May Brock was a hippie, and I guess so was I.  I have to say here that I have never used anything but beef when making chili.  This time around I took a chance on turkey, and I have to tell you it is delicious! It isn't so much that turkey has that much less fat than, say, ground sirloin.  Ground turkey is still 90/10 ratio for fat. It's just that I was feeling a tad more conscious today about the beef thing.  Go ahead and use whatever your choice of meat is, but if you haven't given turkey chili a try, don't turn your nose up until you try it this way and tell me how great it is afterwards!

MY NOT-SO-FAMOUS TURKEY CHILI (YET)
2 Tbs. vegetable oil
2 large onions, chopped
2 large green peppers, chopped
1 to 2 jalapeno peppers, mostly seeded, and chopped
3 cloves of garlic, chopped
2 lb. of ground turkey (not ground turkey breast)
2 28 oz. cans of whole tomatoes
1 small can of tomato paste
4 Tbs. of chili powder (or more to your liking)
1 Tbs. sugar
1 tsp. of salt (add more to taste)
Lots of freshly ground pepper
2 whole bay leaves
1 tsp. cumin
1 tsp. basil
2 tsp. or more of Worcestershire sauce
Cayenne pepper and Tabasco to taste
2 cans of dark red kidney beans, drained

Okay, this looks like a lot of ingredients. But you probably have most of the seasonings.  So let's go.

In a large skillet, saute the onions, peppers, jalapeno and garlic in the oil until soft. Meanwhile, in a large soup pot, brown the chopped meat. Drain the fat, and then add the sauteed vegetables to the meat in the large pot.  Add the two cans of tomatoes, juice and all, breaking up the tomatoes with the back of your spoon. Add the tomato paste and all the rest of the seasonings up to but excluding the kidney beans. Give it all a good stir, cover and simmer this for a good long time, a couple of hours at least, stirring occasionally and checking for seasonings.

Towards the end of the cooking session, add the kidney beans. I like to use the dark red beans, they show up nicer in the chili, and I definitely don't add them earlier on, they get mushy.

Remove the bay leaves before serving!

Serve this in big bowls and pass around all the favorite chili toppings such as sliced jalapenos, shredded cheddar, chopped raw onions, extra hot sauce - and don't forget to pass around a piece of cornbread. For those of you who own my book "Singingirl Cooks" check it out on page 99.  Now what channel is the game on???


This recipe and more than one hundred pages of other great recipes, stories and photos is for sale. Just ask me!

Alice May Brock would be proud of me!

Saturday, September 25, 2010

Mushroom Chowder

Yesterday, my long time gal-pal from State College, PA days, Cathy, sent me a picture of a recipe she made from my book "Singingirl Cooks!"  She told me she was going to be entering it in a contest at her church.  I'll be anxious to know how far up or down the list of entries it placed!  In the meantime, she said it was delicious, and it is.  With fall kind of around the corner for you up-north friends and family, this chowder has terrific flavor and tastes like you were laboring over it all day, even though it comes together in no time. Try it and tell me how you liked it!  Thanks, Cathy, for choosing something from the book for a contest and for sending me this picture to use today.


MUSHROOM CHOWDER
1 lb. fresh mushrooms, sliced
1 cup diced potatoes (2 large) 
1 cup finely chopped celery (2 large stalks)
1 cup diced carrots (2 or 3)
1 clove of garlic, chopped fine
1 tsp. dried thyme
Freshly ground pepper
4 Tbs. melted butter
1 big handful of fresh parsley, chopped
1 pkg. of dry onion soup mix (such as Lipton)
1/4 cup cooking sherry
1/4 cup of flour stirred into 1/2 cup of water
2 cans of chicken broth (or you can use stock)
1/2 cup milk
1/2 cup half & half
1/4 cup grated Parmesan cheese

In a large soup pot, saute the mushrooms, potatoes, celery, carrots, garlic, thyme and pepper in butter until soft over medium heat, ten minutes or so.  Add the onion soup mix and parsley, stir to combine, then pour in the chicken broth and sherry. Stir, then cover and simmer on low for another 15 to 20 minutes. Meanwhile, stir the flour into the water until smooth and add to the pot.  Add the milk and half  & half to the soup over very low heat, along with the Parmesan cheese and continue heating on low, do not boil, until nicely warmed and looking absolutely gorgeous. Serve immediately.   Reheat any leftovers over low heat.

Note~ I don't add salt to this recipe because there is quite a bit in the dry onion soup mix. Add extra to taste after you've put the whole thing together.


P.S. This recipe and more than a hundred pages of other great recipes, stories and beautiful food pictures can be found in my book "Singingirl Cooks!" If you don't own a copy and would like to, please let me know. Thanks!

Tuesday, September 7, 2010

Jerk Chicken Salad with Citrus Dressing


A while back I posted a recipe from The Flat Belly Diet Cookbook for Sassy Water, a refreshing and delicious concoction to make and drink as part of a weight loss plan.  Tonight I improvised on a recipe from that book for a dinner salad, and I just have to share it with you.  I know, what's to get excited about eating a salad, right? This really was great. I loved the jerk seasoned chicken, even though I did buy the seasoning in a jar. And the dressing, light and practically fat free, was perfect for this salad.  Because I didn't have mango that was called for in the salad, nor did I have sweet white onion, I used pineapple tidbits and sliced green onion.

JERK CHICKEN SALAD WITH CITRUS DRESSING 

  • Stir together in a small bowl the juice of half a lime, 1 tsp. of olive oil, and 1 tsp. of jerk seasoning. Find it in the ethnic foods aisle in the Jamaican section. Rub this all over two boneless chicken breast halves and refrigerate for an hour. 
  • Make your dressing by combining 1 Tbs. of fresh lime juice, 2 Tbs. orange juice, 1 tsp. olive oil, 1/2 tsp. honey, 1/4 tsp. salt, and freshly ground pepper.  Pleeeze, if you are noticing that worn out looking bowl I used for the dressing....I just can't part with my son's first cereal dish with Big Bird in the bottom of the bowl. It's so old, 25 years to be exact, but I just love it!

Put together your salad using any combination of greens. I used romaine and fresh spinach. Add:
  • 1/2 of an avocado, cubed
  • 2 green onions, sliced
  • Handful of cherry tomatoes, halved
  • 4 oz. of pineapple tidbits, drained (I buy those little fruit cups, perfect for smoothies, salads, etc.)
Grill the chicken breasts and keep warm while you toss the dressing with the salad greens and divide between two plates. Slice the chicken cross-wise and arrange it along side of the salad or place on top. Either way, this is a winner. Enjoy! And tell me how you liked it.  

Sunday, August 22, 2010

Brown Eyed Susans


When I put together my cookbook a year or so ago, I knew this recipe would have to be part of it. So old is this recipe, I can remember coming home from school and seeing a batch of these on the countertop. As busy as my mother was with four children, she somehow found the time.  If you own the book, you know that I featured this recipe in the dessert section by putting a picture of the original recipe from the back of a Parkay Margarine box. It was so stained and tattered, it tells a big tale, and a happy one too, of those little things that my mother did for us.  Today I went to visit her at her new "home" and brought her some of these cookies so she could decide which lucky resident would get one of them. I wonder if my mother realizes how this silly little recipe that has stuck with me for many years longer than I care to mention has had such an impact on me.  Try the recipe and see for yourself if you think this isn't one of the best shortbread cookies you've ever eaten.  Of course, Parkay Margarine is a thing of the past, so I've used butter here instead, and what's not to like about that?

BROWN EYED SUSANS
1 cup softened butter
3 Tbs. sugar
1 tsp. pure almond extract
2 cups flour
1/4 tsp salt

Cream the butter. Add the sugar, almond extract, flour and salt.  Roll this mixture into small balls the size of a walnut. Place on an ungreased cookie sheet. With your thumb or finger, make a deep indentation in the center of the dough. Bake in a preheated 400 degree oven on the middle rack for about ten minutes until lightly browned on the bottoms. When cool, frost with:

1 cup of confectioners sugar
2 Tbs. cocoa
2 Tbs. hot water
1/2 tsp. vanilla

Sift together the sugar and the cocoa. Add the hot water and vanilla and beat well. Make sure the cookies are completely cooled, then top each cookie with a small amount of frosting. If the frosting becomes thick or hardened while waiting for the batches to cool, add a drop of water and mix it up again. Don't overdo it with the frosting, as you want to end up with a nice little round blob of frosting atop each cookie!

The original recipe called for a blanched almond half to be placed in the center of the frosting, but Mom never did it this way, and we thought they were awesome. I did, however, have sliced almonds on hand and thought the addition of a small thin slice of almond on top would make the perfect decoration for these delicious shortbread cookies.

Makes about 2 1/2 dozen.

Buttery, melt-in-your-mouth Brown Eyed Susans

Monday, August 9, 2010

Chili Cheese Mini-Bites

I've been making a lot of muffin/cupcake shaped things recently, Banana Ginger Snap Cupcakes and Carrot Coconut Cupcakes with Marmalade Buttercream Icing and today isn't any different. The major difference is that this recipe is a tasty little appetizer and not a full-blown, bag-your-diet sweet treat. I was thinking about that line from Julia Roberts' upcoming movie, "Eat, Pray, Love" where she says "leave no carb behind."  Very funny.  So in this recipe, I have left all carbs behind, and you and anyone else eating one can feel comfortable knowing you're eating a cheesy, spicy, veggie-filled little tidbit.  I'm mildly hooked on Cabot Hot Habanero Cheese these days, and I thought a combination of that plus the Seriously Sharp Cheddar would be a good combo.  They're great. Try them next time you're making appetizers.


CHILI CHEESE MINI-BITES 
1 Tbs. butter
3 green onions, thinly sliced
1 clove of garlic, minced
1 tomato, chopped (I used a Roma)
4 eggs, beaten
1/4 cup black olives, sliced (I used half a dozen)
2 oz. Cabot Hot Habanero Cheese
2 oz. Cabot Seriously Sharp Vermont Cheddar
1 tsp. chili powder
1/2 tsp. cumin
1/8 tsp. cayenne pepper
S&P to taste


  • Preheat the oven to 425 degrees and coat a mini muffin tin with cooking spray.
  • Melt the butter in a small pan and saute the onions, garlic and tomato until the onion is soft. Remove from heat and transfer this mixture to a medium sized mixing bowl. Allow to cool for a few minutes.
  • Shred both cheeses.
  • Beat the eggs and add them to the vegetable mixture along with the remaining ingredients.
  • Fill each mini muffin tin with a heaping Tablespoon of the mixture.
  • Bake for ten minutes.
  • Remove from oven, allow to sit for a minute, then run a knife around the edge of the cups and place on a serving dish.
  • Serve warm. These can be reheated easily. Or, serve cold like a quiche.
  • Makes a few less than two dozen, and only about 30 calories each, and a trace of carbs.

Peggy is always where the food is!

Saturday, August 7, 2010

Banana and Ginger Snap Cupcakes

You know what they say about bananas, don't you? Umm, I don't either. I do know that if you're patient but a few days after purchasing them practically green you will have beautifully overripe fruit just perfect for baking.  Plus I really wanted to try out my new decorating tool, and as you can see by the pictures I could use a little more practice. Though they weren't all perfect looking (but they weren't too shabby either for my first time), I promise you they taste awesome. I took almost, that's right, almost all of them to my mother's place today and gave them to the gals working there. They loved them! Using a tried and true banana cupcake recipe from Martha Stewart, I kicked it up a notch with the addition of ground ginger. Here's the simple recipe for these light, moist and delicious treats.


BANANA AND GINGER SNAP CUPCAKES
1 1/2 cups flour
3/4 cup sugar
1 tsp. baking powder
1/2 tsp. baking soda
1/4 tsp. salt
1/2 tsp. ground ginger
1/2 cup unsalted butter, melted and cooled
2 to 3 large ripe, thoroughly mashed bananas
2 eggs
1/2 tsp. vanilla

GINGER BUTTERCREAM FROSTING
1 1/2 cups powdered sugar
1/2 cup butter, very soft
1 1/2 tsp. milk
1/4 tsp. vanilla
1/2 tsp. ground ginger
1/4 cup crushed ginger snap cookies for the tops

Preheat the oven to 350 degrees and line a 12-cup muffin pan with regular sized paper or foil liners. In a mixing bowl, stir together the first six ingredients, the flour through the ginger. In another bowl, stir together well the butter, bananas, eggs and vanilla. Add all at once to the flour mixture and stir well. Divide the batter evenly between the 12 cupcake liners, approximately one-quarter cup of batter per cupcake. Bake for approximately 20 minutes, maybe a minute or two longer, until a toothpick comes out clean and dry. Remove immediately from pans to a wire rack and cool completely before frosting.

For the frosting, mix the sugar and butter together and add the milk, vanilla and ground ginger. You can always add more milk, so always start with less. Frost the cooled cupcakes simply or try your hand at decorating. Sprinkle the tops with the crushed ginger snap cookies. Enjoy!!!

I love comments. It makes me feel like I'm doing this for someone other than myself. If you stop by, and you have an extra second, say hi. Thanks!!!

Not too much, not too little....just perfect!

Friday, July 23, 2010

Carrot and Coconut Cupcakes with Marmalade Buttercream Icing


Why, you must think I've gone nuts making batches of mac and cheese and the like, for who? Just me? Seriously, I am NOT eating all of this stuff.  Like today, for instance, I wanted to bring something to my therapist who is helping me with my..... oh, you thought I was going to say my head, didn't you? She's an occupational therapist, a hand specialist, and she's helping me get the use back in my hand that had surgery in three different places.  I like to bring her things that show my appreciation. I'm bringing her cupcakes today!  Using ingredients I have on hand, I put together a basic cupcake recipe and added some of my favorite things to it, especially in the icing, orange marmalade....  Now, I got a little overly zealous dividing the mixture.  This recipe should really make a dozen cupcakes. But I had two things going against me.  Firstly, I had jumbo cupcake liners and secondly, I didn't want them to look skimpy so I added a little too much batter to each one.  I have more like 8 jumbo cupcakes instead of 10 to 12 regular cupcakes.  When you make them, buy regular sized cupcake liners and divide the batter accordingly.  Enjoy! And let me know if you try them, or if you'd like me to make them for you..... Ask me, I might!


CARROT AND COCONUT CUPCAKES 
WITH MARMALADE BUTTERCREAM ICING
1/2 cup dark brown sugar
3/4 tsp. baking soda
1 tsp. baking powder
1/2 tsp salt
1/2 tsp. cinnamon
1 cup finely chopped carrot
1 cup coconut
1/3 cup raisins
1/4 cup oil (not olive oil)
1/4 cup butter, melted
2 eggs
1 cup flour


  • Preheat the oven to 350 degrees.
  • I chop the carrots first in my food processor. If you have one, do the chopping in it. It produces a very small chop, perfect for the cupcake. If you don't own a processor, then chop away. Set aside.
  • In a large mixing bowl, stir together the first seven ingredients, the sugar through the raisins.
  • Using a hand mixer, beat in the oil and butter.
  • Continuing to use the mixer, add the eggs one at a time, beating well after each addition.
  • Lastly, add the flour and beat with the mixer for another minute or two. (like you would a cake mix).
  • Divide the mixture among at least 10 to twelve regular cupcake liners set in a muffin tin. Bake for approximately 20 minutes or until a toothpick comes out clean and dry. Remove from the muffin tin and cool on a rack completely before frosting.


MARMALADE BUTTERCREAM ICING
1/2 cup butter, softened
1/3 cup orange marmalade
1/2 tsp. vanilla
1 1/2 cups powdered sugar
1 to 2 tsp. milk
1/4 cup finely chopped pistachio nuts, optional

Very simply, cream the butter, marmalade and vanilla together. Sift the powdered sugar over the top and stir until starting to become incorporated. Add the milk a teaspoon at a time until the desired spreading consistency.  Wait until the cupcakes are completely cooled before frosting. If you like, sprinkle the tops of the frosted cupcakes with the chopped nuts.  Wow, enjoy!


Tuesday, July 20, 2010

Hot Habanero Mac and Cheese

Never one to leave well enough alone, I even had to take dear old Fannie Farmer's classic baked macaroni and cheese and do something different with it. You see, I had this block of Cabot Hot Habanero Cheese around and part of a box of corkscrew pasta and got a brainstorm.  This was really, really good. Definitely not for you if a little heat turns you away from a dish. And definitely not for you if you're counting calories this week. Thankfully, I do not make these kinds of calorie-laden dishes very often. But there comes a time in everyone's life when nothing else will do to accompany that main course except a helping of crunchy-topped, creamy on the inside, and spicy through and through, mac and cheese.  Of course, you can make this recipe without the habanero cheese and enjoy it just as well.  

HOT HABANERO MAC AND CHEESE
3 cups of corkscrew shaped pasta
4 Tbs. butter
4 Tbs. flour
1 whole clove of garlic, peeled
1 1/4 cups milk
1 cup half and half
1/2 tsp. salt
1/4 tsp. pepper
1 1/2 cups sharp cheddar cheese
1/2 cup Cabot hot habanero cheese
1/2 cup Panko breadcrumbs
1 Tbs. butter, melted


  • Preheat the oven to  400 degrees.
  • Shred the cheese and pack into a 2-cup measuring cup. Set aside.
  • Toss the Panko breadcrumbs with the melted butter. Set aside.
  • Cook pasta according to package directions. Drain well and pour back into the pot. Set aside.
  • In a large saucepan melt the butter, and add the whole clove of garlic to flavor the sauce.
  • Add the flour, salt and pepper, using a whisk to stir until well blended.
  • Pour the milk and half & half in gradually, whisking constantly.
  • Bring to a boil, reduce heat and cook, stirring constantly, for a few minutes until very thick. Discard clove of garlic.
  • Remove saucepan from heat and stir in the shredded cheese until completely melted.
  • Pour this sauce over the pasta and stir to coat well.
  • Transfer the mac and cheese to a buttered baking dish (or just use a cooking spray)
  • Sprinkle with the Panko breadcrumbs.
  • Bake for 20 to 25 minutes or until the top is golden brown.


Sunday, July 18, 2010

Deviled Salmon Cakes with Lemon Yogurt Sauce

My sister Joanna contributed this recipe to my cookbook "Singingirl Cooks!"  You certainly can find pretty much this same recipe in most internet searches. But I put a little twist on the original to kick it up just another notch. These are absolutely delicious, and the amazing thing is that it uses canned salmon.  Oh, I know. The groans and grossness of pulling apart that salmon in the can to remove bones, etc. It's really not that big a deal. But if you prefer you can buy a piece of salmon, poach or bake it, let it cool and then flake it yourself to make about two cups. So, here is the recipe. The slightly long list of ingredients and the little bit of prep time is well worth the effort. I found that when I did an inventory to see what I needed to buy, I already had everything except a tiny can of corn, a container of yogurt and the parsley.

DEVILED SALMON CAKES WITH LEMON YOGURT SAUCE
1 large can of salmon, drained and bones removed
1/2 cup finely chopped onion
1/2 cup finely chopped celery
1 small jalapeno pepper, seeded and finely chopped
1/2 cup corn, canned or frozen
Salt and pepper to taste
1/2 cup mayonnaise
1 Tbs. Dijon mustard
1 tsp. pickle relish
1 tsp. lemon juice
1/2 tsp. Worcestershire sauce
1/4 tsp. paprika
2 big dashes of hot sauce
1 egg
1/2 cup cracker crumbs
1 cup Panko breadcrumbs
2 Tbs. butter
2 Tbs. canola oil

Flake the salmon into a bowl. Add the onion, celery, jalapeno, corn, salt and pepper. Mix together and set aside.

In another bowl, combine the mayonnaise, egg, mustard, relish, lemon juice, Worcestershire, paprika and hot sauce. Fold these ingredients into the salmon mixture along with 1/2 cup of cracker crumbs. Place the Panko on a plate.

Form the salmon into cakes. You can make six larger ones or eight smaller. Carefully coat them with the Panko. I found that holding the salmon cake and patting the Panko on one side, then flipping it over in my hand and patting the crumbs on the other side worked better than laying the salmon cake in the dish, the reason being the salmon is soft and might tend not to keep its shape. Do whatever way works for you.

Refrigerate the cakes on a plate loosely covered with saran and chill for about an hour.

Melt the butter and oil in a large nonstick skillet over medium heat. With your spatula, lift each salmon cake off the plate and add to the pan. Cook half of them about four minutes or so on each side, pressing down gently on them once or twice with your spatula. Turn carefully and fry the other side four minutes or so or until nicely browned.

To serve, place a big spoonful of the lemon yogurt sauce on each plate and spread it out a bit with the back of your spoon. Top with a salmon cake and garnish with parsley and lemon slice.  Enjoy!!

LIGHT LEMON YOGURT SAUCE
1 cup of plain fat free yogurt
1 tsp. freshly grated lemon peel
1 Tbs. lemon juice
1/4 cup chopped parsley
OR 1/2 tsp. tarragon
Salt and pepper to taste

Mix all ingredients together and keep chilled until ready to serve.  You can easily double this recipe, and I suggest you do!

Sunday, July 11, 2010

Delicious Onion Soup With Miniature Toasts and Parmesan Crisps


Why would I want to be making soup in south Florida in 90 degree weather? Better yet, why would I think any of my friends and family would want to make soup in such a torrential downpour of heat and sun? The answer is, I don't know why. I've just been thinking lately about making a good tasting onion soup after having had some so-so, rather salty onion soup in a restaurant last week with my mom. And, well, there is air conditioning keeping me cool inside for the venture. So, here it is.  Make this soup.  It's vegetarian (for all my non-meat eating friends and family.) It's delicious. It's topped with a wonderful miniature bread toast and a Parmesan crisp instead of that big blob of melted cheese. I know, I know. That's what's good about it, right? Try it this way, and let me know how you like it.


DELICIOUS ONION SOUP WITH MINIATURE TOASTS AND PARMESAN CRISPS
4 heaping cups of onions, peeled and thinly sliced
3 Tbs. butter
1 Tbs. Worcestershire sauce
1/2 cup sherry (you can use bottled cooking sherry if you must, but don't tell anyone)
4 cups of vegetable broth (see below for my tip)
Freshly grated Parmesan cheese
Packaged Miniature Toasts

Melt the butter in a large pot. Add the onions and cook and stir often over low to medium heat until the onions are fully softened and starting to brown. This process will take at least 45 minutes to one hour. There is no rushing this step.  Increase the heat to high, add the Worcestershire and sherry and cook for a minute or two, or until the sherry reduces. Stir in the 4 cups of broth, lower the heat and simmer another 20 minutes or so.  

Here's my tip for the broth.... You can use cans of broth if you like. In this recipe I used a seasoned roasted vegetable cooking base. Find them in the canned soup aisle, Better Than Bouillon is the one I used.  They really are much better than bouillon, less salty, and much more flavorful.  The jar costs a few dollars, but you'll find  that you'll be seasoning the water with it when you make rice, pasta, other soups, sauces. Use 1 tsp. per cup of water (you'll need 4 tsp. for this recipe.)

While the soup is simmering, make the crisps.  Preheat the oven to 375 degrees and set the oven rack in the middle. Finely grate the Parmesan and use 1 Tbs. per crisp. Dump it onto a well oiled baking sheet (I used cooking spray) and then with the back of your spoon flatten the mound out a little. Grind some pepper on each one. Don't crowd, maybe only 6 to a baking sheet. Bake for 8 minutes approximately. 
Remove from oven and carefully slide your spatula around the edges and remove each one to a rack.  My pictures above show the process, and you CAN do this! It was actually very easy, and I surprised myself.  This is Alton Brown's recipe from Food Network.  They are soooo delicious! And no carbs! Ladle the soup into your bowl and set the bowl on a serving dish.  


Surround the bowl with one or two toasts and two or three crisps and let the lucky recipients assemble their own garnish.  Enjoy!!! And please say hello in the comment section below. 


Tuesday, June 29, 2010

Blueberry and Cheddar Cornmeal Mini-Muffins

The temptation was there.  Blueberries, finally 2 for $3.00.  They have come down in price as far as they will probably go this season.  Not that I didn't pay more for them a few weeks ago to make that incredible Fresh Blueberry Pie.  You made it, didn't you? Well, I know some of you did.  Okay, here's my corn muffin recipe tweaked just a little bit to include blueberries and a little zip from some cheddar cheese. I used sharp white cheddar, but you can use the orange cheddar. This recipe calls for buttermilk, and I don't know about you but I never, repeat, never have buttermilk in the house. If you have a recipe that calls for buttermilk, like this one, measure 1 1/2 Tbs. of cider vinegar into a measuring cup and add milk to measure one cup.  Let it stand for a few minutes. It actually smells like buttermilk, and you will never notice the difference in your recipe. Of note, I only use this method for baking. If you're making a soup that calls for buttermilk, buy the real thing.


BLUEBERRY AND CHEDDAR CORNMEAL MINI-MUFFINS
1 stick of butter
2 eggs
1/2 cup sugar
1/2 tsp. baking soda
1/2 tsp. salt
1 cup buttermilk
1 cup coarse or medium yellow cornmeal
1 cup sifted flour
1/3 cup shredded sharp cheddar cheese
2/3 cup blueberries, rinsed and dried

Preheat your oven to 375 degrees. Melt the butter and pour into a large mixing bowl. Let it cool for a few minutes, and then add the two eggs, beating well. Stir in the sugar, baking soda, salt and buttermilk. Stir in the cornmeal, flour, and cheese.  Fold in the berries. Coat a mini muffin pan with cooking spray, and fill each mini-muffin cup with about a quarter of a cup of batter, making sure you've got at least two berries in each muffin.  The batter should come to the top of the cup for a nice full-sized muffin. Do not use paper liners.  Bake for about 13 to 14 minutes or until a toothpick comes out clean. Makes 30 mini muffins.  These muffins are so moist with the addition of the blueberries and cheese and the slightly crunchy texture of the cornmeal, you won't need butter. Just pop the damn thing in your mouth and get over it.


Friday, June 18, 2010

Easiest & Best Fresh Blueberry Pie

Oh joy.... blueberries are back in season again. An opportunity to make this pie.  This recipe came from my mother, who I believe got it from our next door neighbor many moons ago. She was an expert pie baker, our neighbor. Once you make this, you will never look at another recipe for blueberry pie. I'm serious. Just to show you how serious I am, I'm offering a money back guarantee.  Wait a minute. I'm not selling you anything. How can I offer a money back guarantee?  Listen, July 4th is around the corner. Good excuse to make this. But don't wait until then. Make one now and see for yourself. The combination of fresh and cooked berries with the slightly tart taste of lemon.....all poured into a pre-baked and cooled deep dish pie crust, then topped with toasted coconut, and chilled!  I never met a frozen pie crust that I didn't like. Of course, if you're a purist then roll out your own crust from scratch.  Fifteen or twenty minutes from start to finish (except for the chilling time), the pie serves six generously or eight not so generously.

EASIEST AND BEST FRESH BLUEBERRY PIE
3/4 cup sugar
2 1/2 Tbs. cornstarch
1/4 tsp. salt
2/3 cup water
3 cups blueberries, divided
2 Tbs. butter
1 1/2 Tbs. lemon juice (about half a lemon)
1/3 cup coconut, toasted (optional)


Spread the coconut onto a sheet of foil and toast in a 350 degree oven, stirring occasionally, until browned and sweet smelling. Remove from oven and allow to cool.

Mix the sugar, cornstarch, salt, water and 1 cup of the blueberries together in a saucepan over medium heat. Bring to a boil and cook until the berries have "popped" and the mixture is thickened, bubbly and dark purple in color. Remove from heat and stir in the butter until melted, then stir in the lemon juice and then fold in the remaining two cups of berries.

Pour into a pre-baked, cooled pie crust, one that you've slaved over yourself, or a frozen deep dish pie crust.

Sprinkle the toasted coconut over the top of the pie. Chill until firm. Serve with whipped cream or vanilla ice cream.


Saturday, June 5, 2010

Chicken Taco Salad with Salsa Lime Dressing

I am more than a little technically challenged. As well, I am working with only one good hand at the moment due to some surgery. But a while back I made this salad, took pictures, and never posted the recipe. I know everyone has probably thrown together their version of taco salad. So here is my offering to either bore you to pieces or inspire you to go out and get the ingredients to make this.  I made an attempt at putting together a slide show of the ingredients and method. As you view it, you can run your cursor over the picture and read the caption that accompanies it. I know, I know, it's juvenile at best. But it is my attempt at "stirring" up some interest!  And if you post a comment, please be kind.  I'm fragile (not really.)  Enjoy!!

This is such an easy salad to put together. Everyone loves the combination of these vegetables and chicken, especially in a quick salad. The tangy lime salsa dressing is what makes it special. Use any type of salsa you like, but I found Paul Newman's Salsa Lime Dressing to be outstanding with the addition of extra fresh lime juice and diced jalapeno peppers.

CHICKEN TACO SALAD WITH SALSA LIME DRESSING

For the dressing, mix together 1 cup of sour cream, about a cup of your favorite salsa, juice of half a lime or more, and a heaping tablespoon of diced jalapeno peppers (I buy them in the jar.)  These amounts are merely approximate. You're looking for a dressing of pouring consistency and a nice pinkish color. Mix all of this together and chill.

For the salad:
1 lb. skinless, boneless chicken breast
1 pkg. of taco seasoning mix
Lettuces of your choice. I like iceberg and romaine
Chopped tomatoes, or whole grape tomatoes
Green onions, sliced
Black olives, sliced
1 can black beans, drained
Shredded cheese. I like sharp cheddar and pepper jack
Tortilla chips

I like to clean the chicken and then partially freeze it before cutting. You won't believe how much easier it is to cut up.  Cook the chicken over medium heat until it is no longer pink. Add the seasoning mix and the amount of water the package calls for. In the meantime, drain and heat the can of black beans, season them how you like, or not at all. I use onion powder, fresh sliced garlic, a little chili powder. Prepare all your veggies for the salad and toss together in a big bowl.

Distribute the salad onto your dinner plates. Spoon the warm beans and chicken over the salad. Spoon the dressing over the top and sprinkle with crushed tortilla chips.  Really good!!